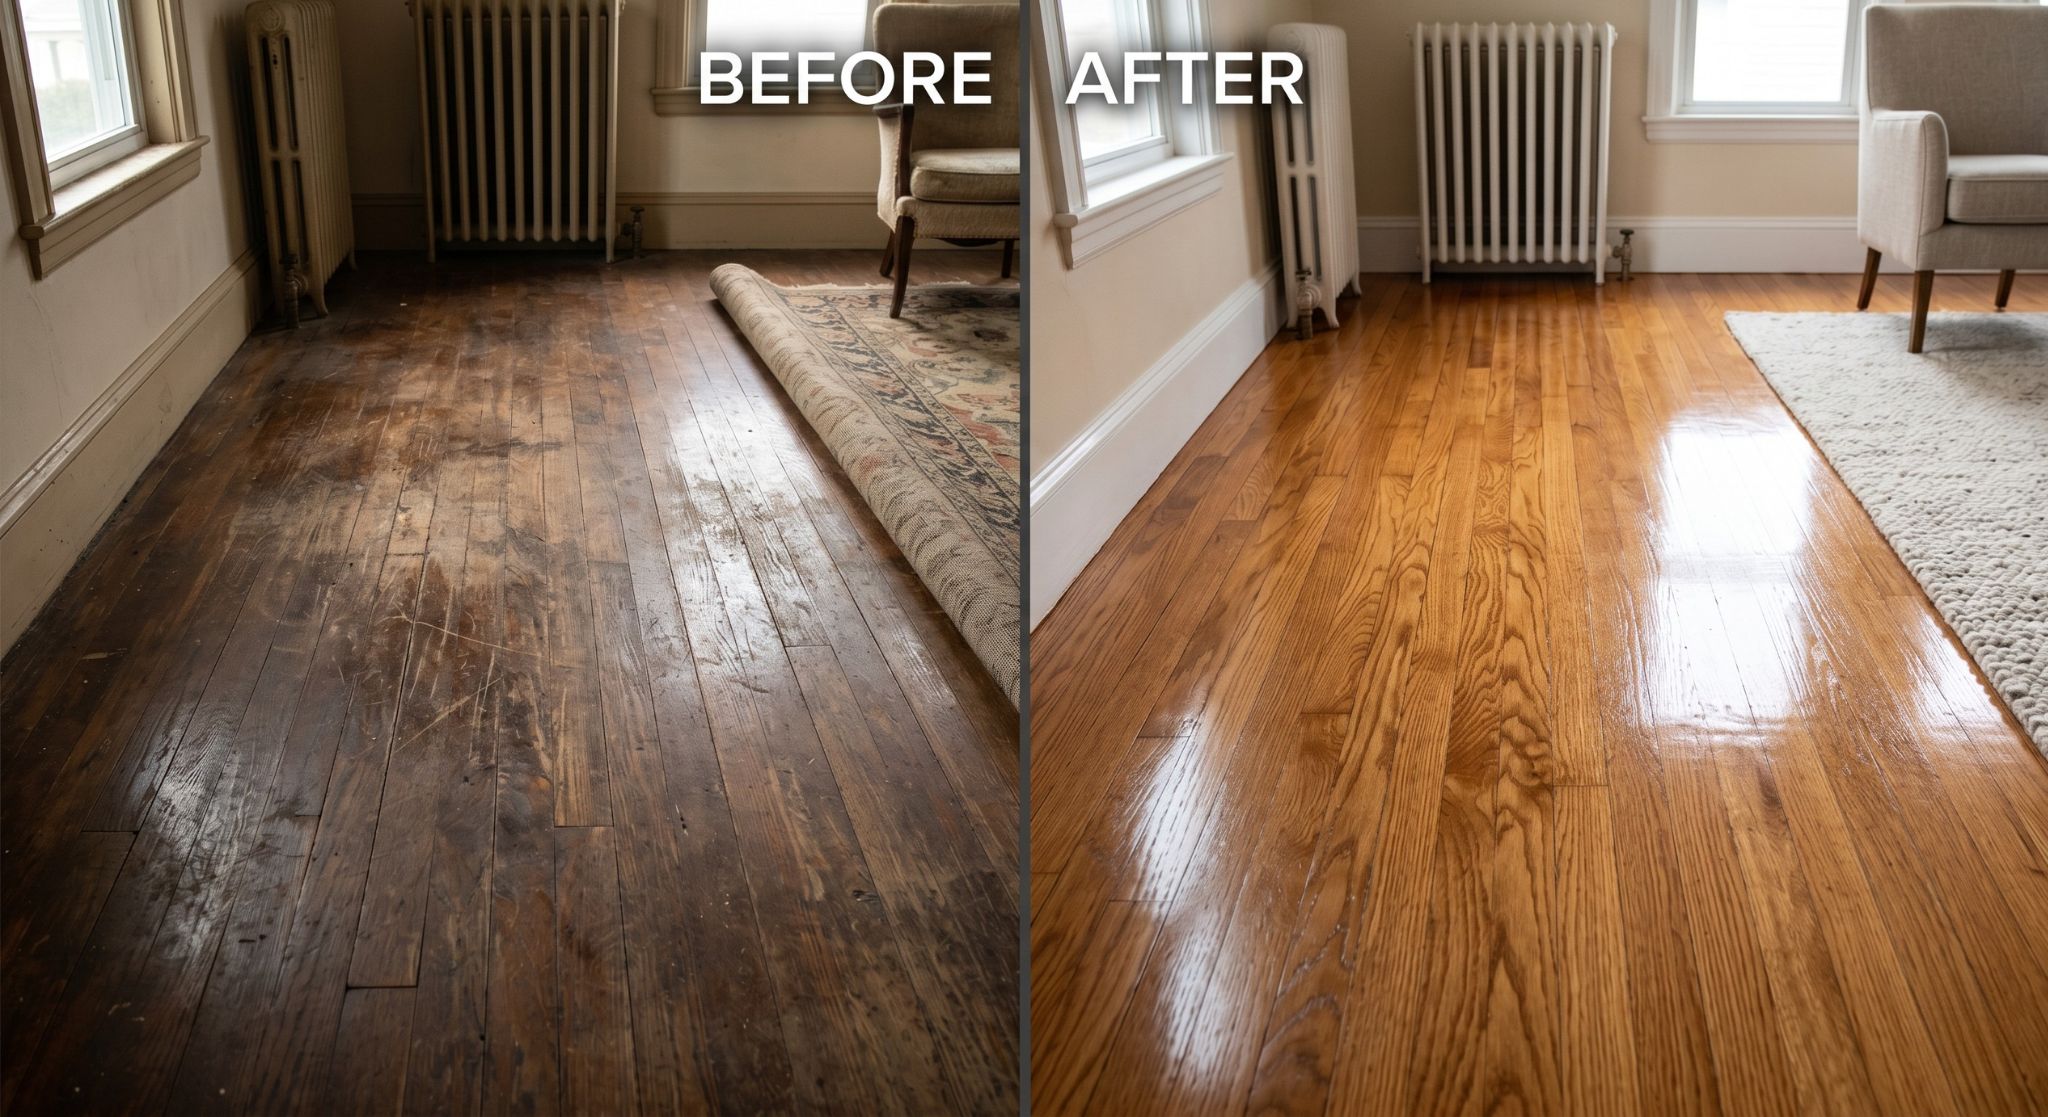
Is DIY Floor Refinishing Worth It?
Hiring a professional to sand and refinish hardwood floors typically costs $3–$8 per square foot — which means a 1,000 square foot home can run $3,000–$8,000 or more. Renting the equipment and doing it yourself brings that cost down dramatically, often to just a few hundred dollars for the rental fees plus supplies.
The tradeoff is time and effort. Refinishing floors is physical work and requires attention to detail. But if you're reasonably handy and willing to put in a weekend, it's absolutely doable — and the results can look just as good as a professional job.
Here's exactly how to do it.
What You'll Need
Equipment to rent:
- Drum sander or orbital floor sander (available at most equipment rental shops)
- Edge sander for perimeter work
- Buffer/polisher for final smoothing (optional but recommended)
Supplies to buy:
- Sandpaper in multiple grits (36, 60, 80, 100, 120)
- Floor stain (if you're changing the color)
- Polyurethane finish — oil-based for durability, water-based for faster dry time
- Applicator pads or lambswool applicators
- Tack cloth and vacuum
- Painter's tape and plastic sheeting
- Respirator, safety glasses, and knee pads
Step-by-Step Process
Step 1: Prep the Room
Remove all furniture. Pull up any staples or nails sticking up from the floor — these will tear your sandpaper. Check for squeaky boards and screw them down. Seal doorways with plastic sheeting to contain the dust. Sanding generates an enormous amount of fine dust — more than you'd expect — so seal off air vents too.
Step 2: First Sand — Rough Grit
Start with 36 or 40-grit sandpaper and sand diagonally across the grain of the wood at about a 45-degree angle. This removes the old finish quickly and levels out any unevenness. Keep the sander moving at all times — stopping in one spot will create a divot that's very hard to fix.
Use the edge sander along the perimeter and in corners where the drum sander can't reach.
Step 3: Second Sand — Medium Grit
Switch to 60–80 grit and sand with the grain this time, going the length of the boards. This removes the scratch marks from the first pass and begins smoothing the surface.
Step 4: Final Sand — Fine Grit
Finish with 100–120 grit, again with the grain. By this point the floor should feel noticeably smooth. Vacuum thoroughly, then wipe down with a tack cloth to remove all remaining dust. Any dust left on the floor will show up in your finish.
Step 5: Stain (Optional)
If you're changing the color of the floor, apply your stain now. Work with the grain, wipe off the excess within a few minutes, and let it dry completely — usually 8–24 hours depending on the product and humidity.
Step 6: Apply Finish
Apply your polyurethane in long, thin coats with the grain. Three coats is the standard for a durable finish. Lightly sand with 220-grit between coats (a pole sander works great for this) and wipe with a tack cloth before each coat. Let each coat dry fully before applying the next.
The final coat needs 24 hours before light foot traffic and 72 hours before moving furniture back in.
Common Mistakes to Avoid
- Stopping the sander in one spot. Always keep it moving.
- Skipping grits. Going from 36 to 100 in one jump leaves deep scratches that show under finish.
- Not vacuuming thoroughly between coats. Dust in the finish looks terrible and can't be fixed without sanding again.
- Applying finish too thick. Thin coats dry faster, harder, and more evenly.
- Working in high humidity. Georgia summers are humid. Try to pick a dry weekend, or run a dehumidifier in the room before and during finishing.
Local tip: Rent our Dehumidifier ($45 half day / $75 full day) before you start finishing if it's a humid day. Humidity slows dry time and can cause a cloudy or uneven finish on oil-based polyurethane.
Need Equipment for Your Floor Project?
We carry dehumidifiers and other tools that make floor refinishing easier. Give us a call in Monroe.
Call or Contact Us